This guide is intended for NFTDrop contracts (ERC-721A) and is meant to be a low-code solution.
Let’s say you have a NFTDrop collection called “Crypto Cats” which contains 10,000 items. Upon lazy-minting those 10,000 items, you realize that you have made a small typo in all their names.
Instead of naming them "Crypto Cats Token", you accidentally added an extra “s” like this:
{
  name: "Crypto Catss Token", // <--------- "Catss"
  description: "This NFT belong to the Crypto Cats collection",
  image: "ipfs://Qm....",
  ...
}
Now, if only you have made the typo on a few items, you can use the thirdweb Dashboard to manually update the metadata on those few. Checkout this guide: https://blog.thirdweb.com/changelog/updateable-nft-metadata-in-dashboard/
So here comes the challenge: How to fix the names of all 10,000 items at once (because it would be incredibly inefficient to update it one-by-one)
Fortunately, all the latest thirdweb Drop contracts come with a write method called updateBatchBaseURI , allowing you to update the metadata of all NFTs in a given “batch”. To learn how to use it, you would have to understand how a Drop contract “organizes” the NFTs that it holds.
Every time you upload a bunch of items to the contract (the action is also called “lazy minting”), you are creating a new batch containing all those items.
In this example, these first 10,000 items belong to the same batch. Since this is the first batch ever uploaded to the contract, the batch ID is 0 (the next batch ID will be 1, 2 and so on).
The metadata files of those items are uploaded to IPFS in a same folder. let’s say you upload the first 10,000 items to an NFTDrop contract, the end result would look like this:
ipfs://Qm...abcxyz/0
ipfs://Qm...abcxyz/1
ipfs://Qm...abcxyz/2
ipfs://Qm...abcxyz/3
...
ipfs://Qm...abcxyz/9998
ipfs://Qm...abcxyz/9999
These first 10,000 items’ metadata files are uploaded in a same folder on IPFS, so the “Base” here is ipfs://Qm...abcxyz
For every batch ID, there will be an unique associated base URI.
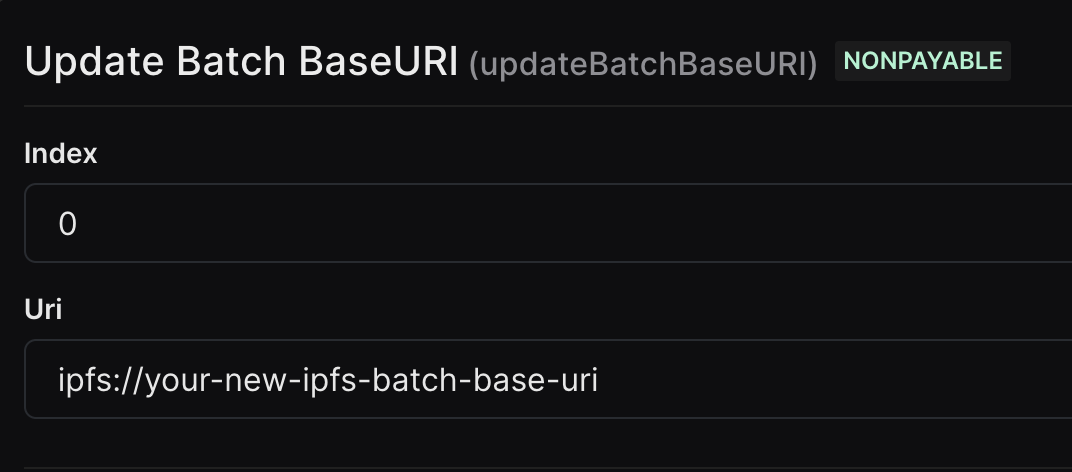
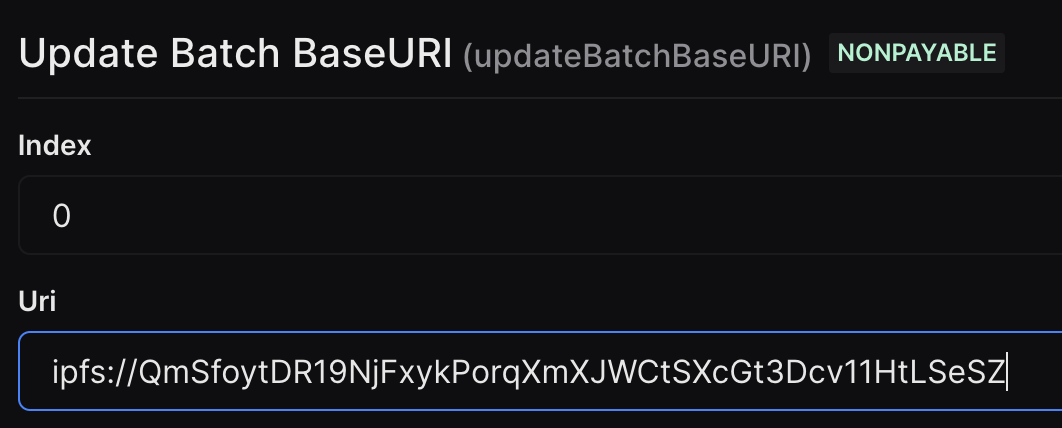
updateBatchBaseURIIf you go to the contract Explorer on the thirdweb Dashboard, you can see that the function takes in 2 parameters: _index and _uri. Index here is the index of the batch (or batch ID) and not the tokenId. And URI is the new base URI that contain the corrected metadata. In this example you uploaded all 10,000 items at once, so conveniently, there will only be one batch and that batch ID will be 0.
The challenging part here is preparing the new content (with the corrected names) for all 10,000 items, re-uploading them, retrieving the new IPFS URI, and using as the value for the second parameter - with the least amount of effort. Below are the suggested steps:
First of all we need to retrieve the base URI that you are going to replace. This is essential for step 2.
Here’s the trick: since all the tokens in a batch share the same batch base URI, the tokenURIs in that batch (let’s say batch #0) will share the following format:
ipfs://<batch-base-for-batch-id-0>/<tokenId>
You can get the tokenURI of any token by calling the read method tokenURI which takes in a single parameter, an uint256, representing the targeted tokenId.
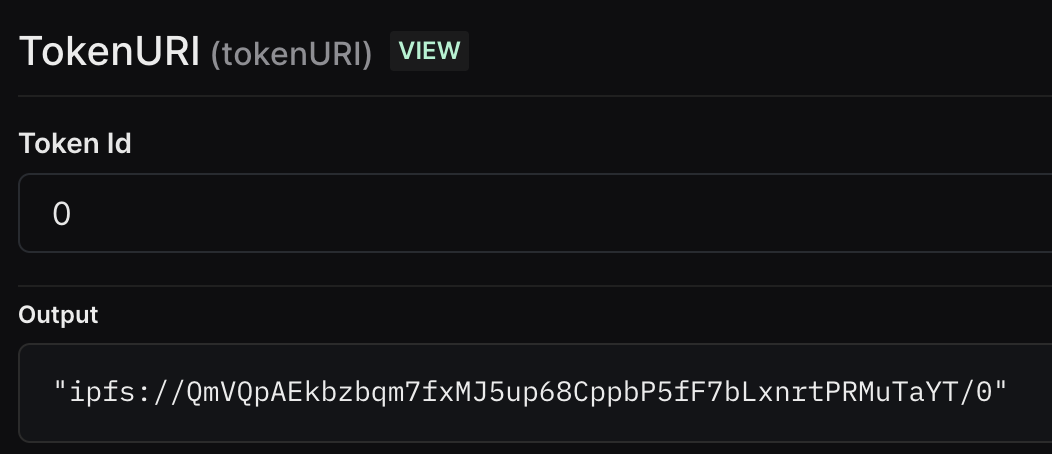
As you can see here, the tokenURI of the #0 token is: ipfs://batch-base-uri/0
Once you have the output similar to the image above, we can move to step 2.
Since you only want to update part of the metadata - the name of the NFTs - you want to retain all the rest of the info. The idea of this step is to download all the current metadata files → open them in a text editor → fix the typo → re-upload the files to IPFS.
Once re-uploaded, you will have the new batch base URI that you can use in the updateBatchBaseURI method!
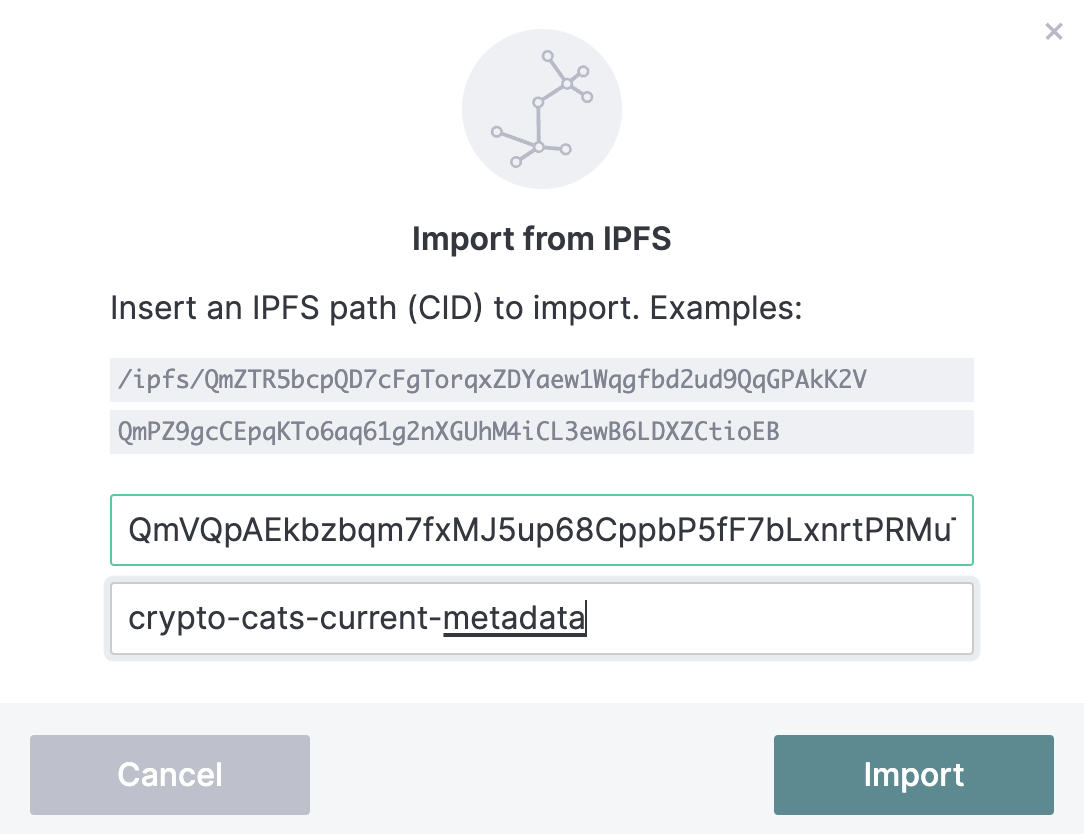
First you need to install IPFS Desktop. Once installed, the CID can be imported from IPFS and downloaded to your machine. A guide can be found here:
IPFS Desktop Tutorial | IPFS Docs
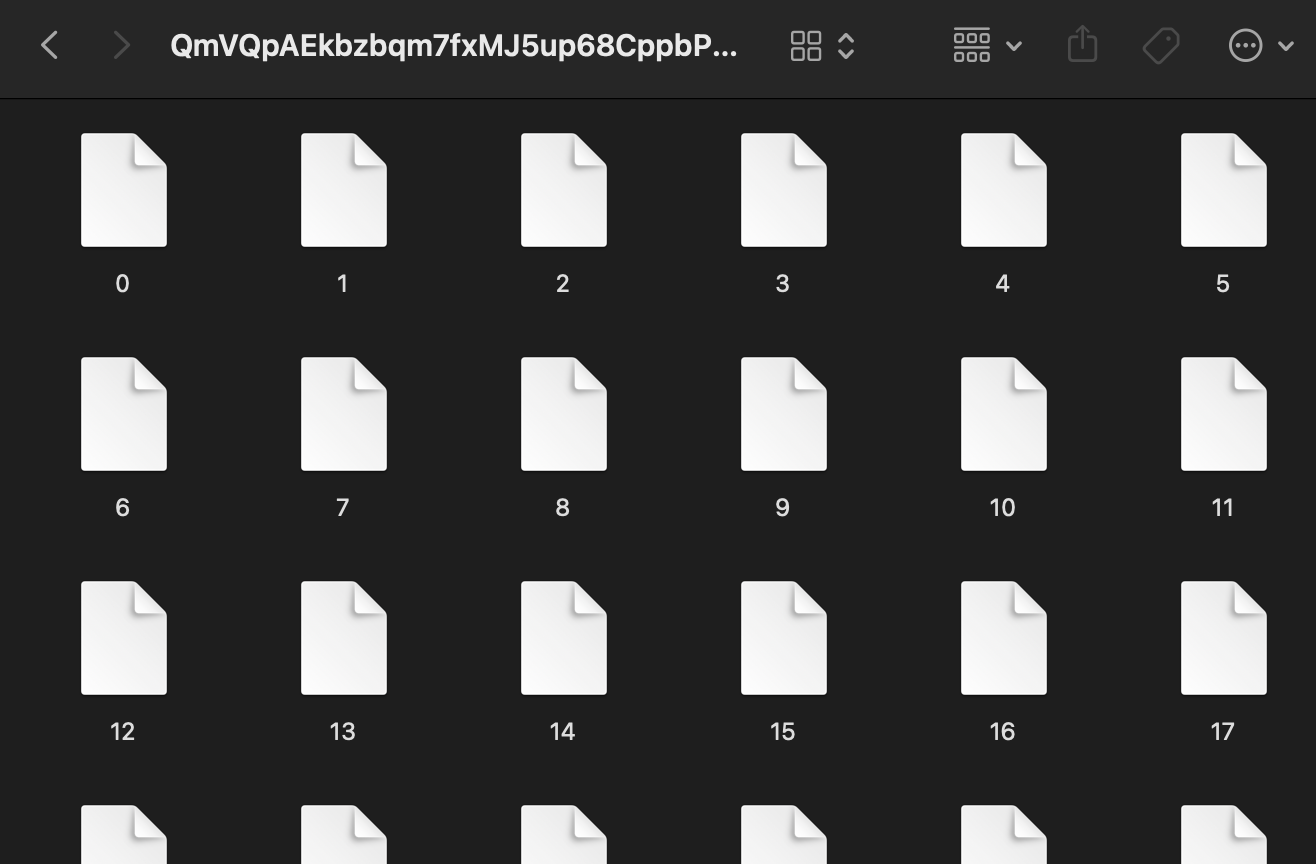
And the downloaded files would look like this:
If you have IPFS Kubo installed on your system, you can simply do:
ipfs get <cid>
# this is example, the full command would be:
# ipfs get QmVQpAEkbzbqm7fxMJ5up68CppbP5fF7bLxnrtPRMuTaYT
At this point, your should be able to download a compressed file containing all 10,000 items from 0 to 9999 via your IPFS Client (Node). You should extract the folder and open it in a text editor. I will be using VS Code in this example.
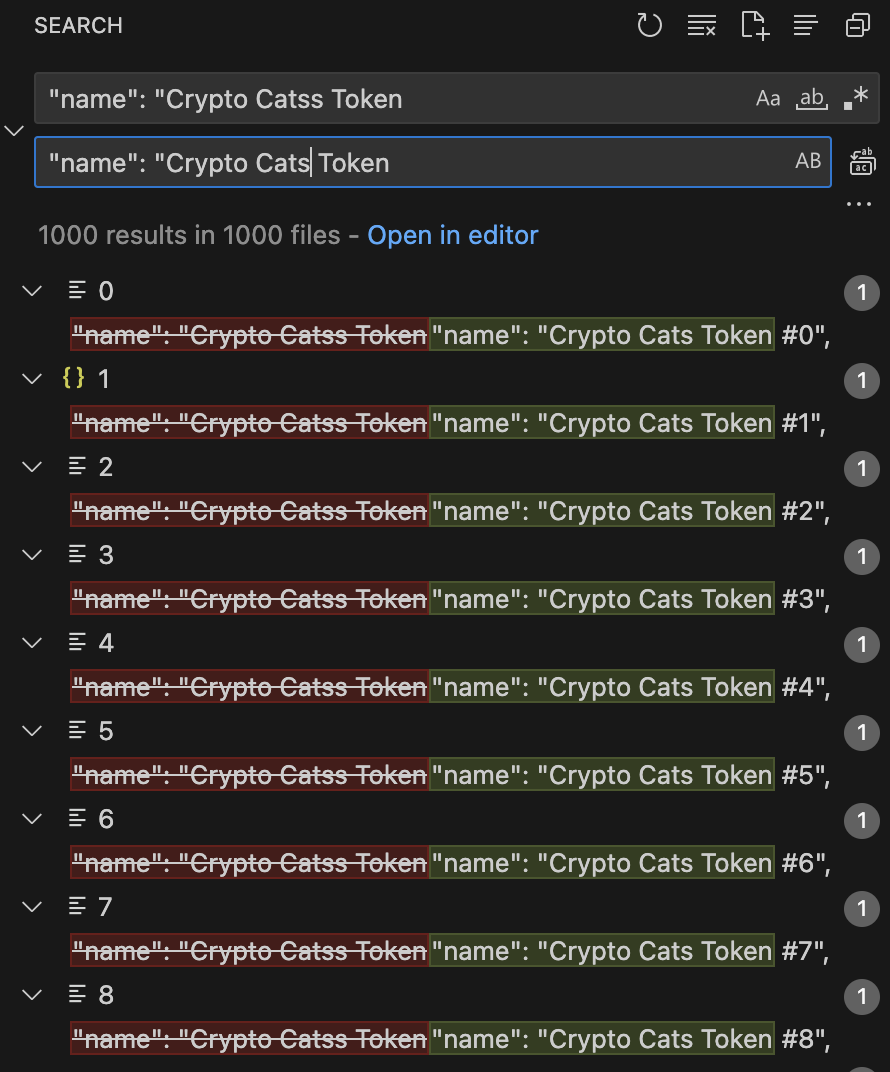
Using the Global search + Replace feature, it takes seconds to fix all the names at once:
Head over to thirdweb Storage page: https://thirdweb.com/dashboard/settings/storage
Here you should be able to drag and drop the folder (containing 10,000 updated metadata files) to the upload zone. Once uploaded, this is what you’ll see:
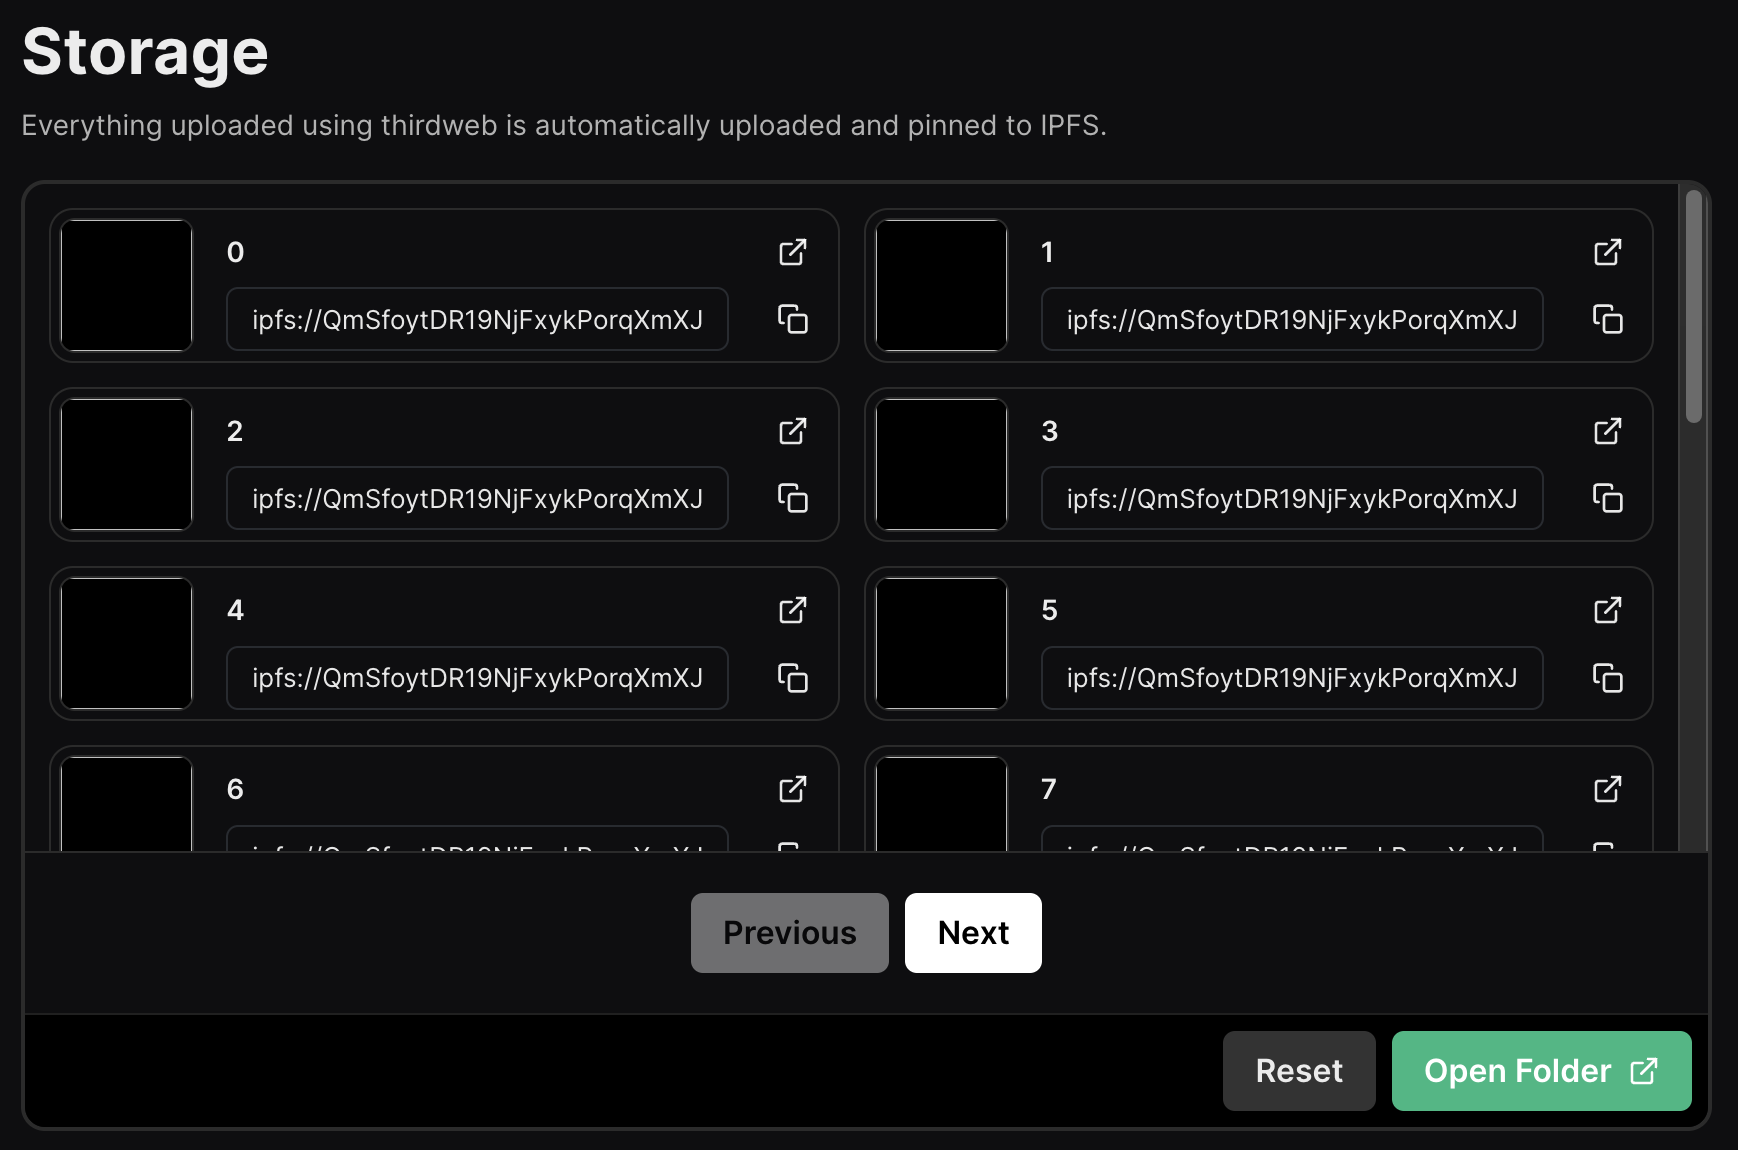
If you click on the Copy button of one of the uploaded items (in the image above), you will get something like this:
ipfs://QmSfoytDR19NjFxykPorqXmXJWCtSXcGt3Dcv11HtLSeSZ/0
IMPORTANT: You must strip out the file name (which is 0 in this case) and the trailing slash.
The result will be the new batch base URI that you can use!
# New batch base URI:
ipfs://QmSfoytDR19NjFxykPorqXmXJWCtSXcGt3Dcv11HtLSeSZ
Now you have both the batch ID (zero) and the new batch base URI, you can go back to the Dashboard Explorer, enter the two parameters, and hit Execute. That new names for the NFTs should be reflected in a short while.
Keep in mind that some NFT marketplaces do not show the freshest data from the blockchain. They often cache the data so save on cost and achieve better performance. If you are using OpenSea and still see the old “typo” name, try to hit the “Refresh Metadata” button.